My friend Lara and I, like many people these days, are obsessed with the MCU, and have been since the beginning.
Lara was also graduating with her Surgical Tech degree right around the time of WandaVision’s season/series finale.
I put together a Congratulations gift set that included many things that the internet deemed handy for a person going into the medical field. One such gift was a lunch cooler, and after choosing one with high praise, I came up with the idea that some of the smaller gifts could be wrapped in faux food products inspired by the Marvel Cinematic Universe to place inside.
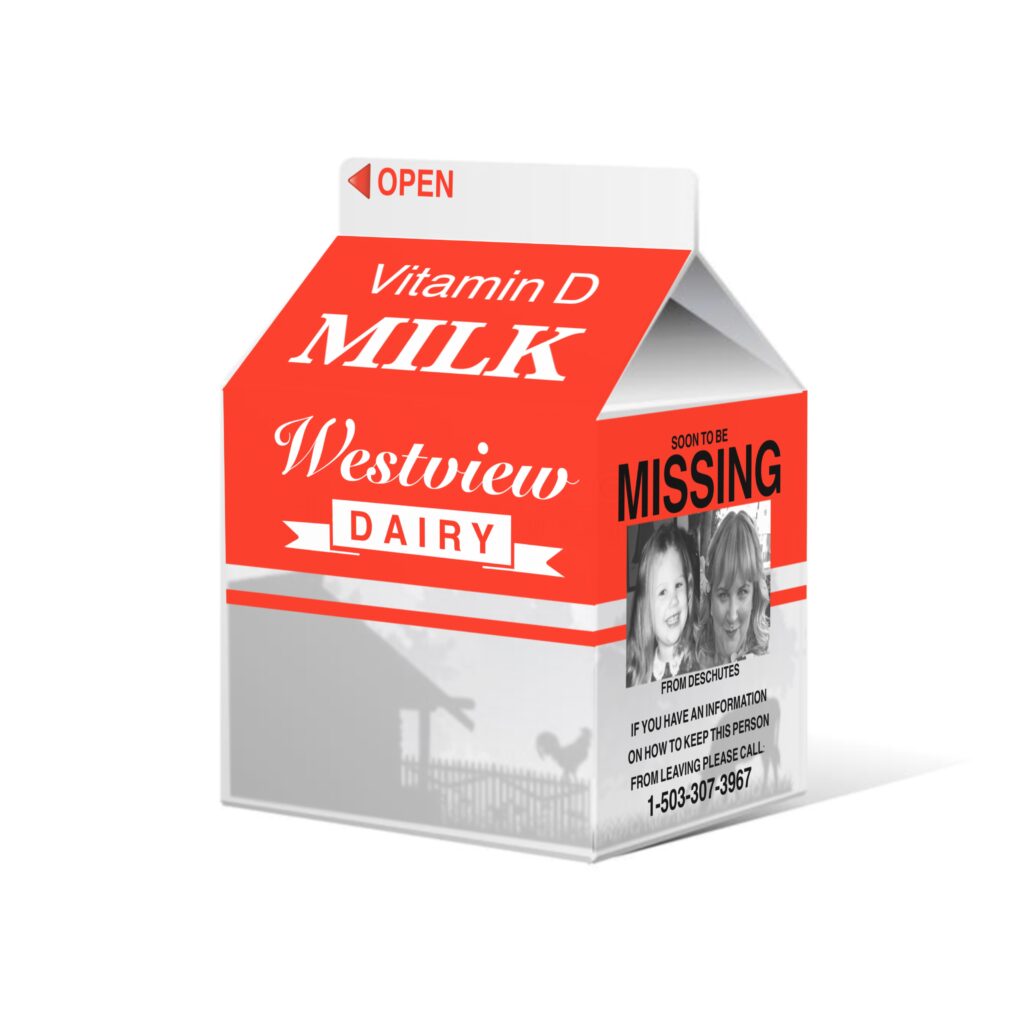
In it I created a Loki candy wrapper, a What If…? make-believe bag of chips to wrap some hot pink compression socks and (of course) this Westview Dairy milk carton gift box inspired by Wandavision. This project was created using only Cricut Design Space elements, so no graphic design software or skills needed.
MATERIALS NEEDED
- Cricut machine
- Cricut Design Space
- Printer
- Photo Paper
- Double sided tape, or other form of adhesive
- Tissue paper and small gift (optional)
HOW TO:
The first thing I did was search “milk carton” in Cricut Design Space to use as a template for designing. I found this one and inserted it onto the canvas.
Using Procreate I dropped the template image onto my canvas. I dropped down the opacity to use as a reference for scale and design placement.
I created a new layer and began creating the general shape by essentially tracing the template’s outer lines. Knowing this project would be larger than the Cricut Design Space Print Then Cut dimensions of 6.75”x9.5”, I decided to break up the carton into two sides. This meant having to add an extra tab to one half to be able to attach them once the project was completed.
Then, using a screenshot of the milk carton from Wandavision, I began recreating a condensed version onto my template. First I drew the red upper portion, then added text, and finally placed some background farm images I found online.
The “MISSING” images were found by stalking my friend’s Instagram. I was lucky that she had posted an image of herself as a child. I simply screenshot grabbed, cropped it and did a side-by-side with a photo I had taken of her recently.
The final touches were to add a ‘Please Recycle’ logo on one bottom flap, and a S.W.O.R.D. logo on the other. These details could be easily overlooked, but I feel the smaller the detail, the bigger the pop. That’s why I often hide Easter eggs in my designs: birth dates, nicknames, etc.
Once I was happy with the design I saved it as a PNG and brought it into Cricut Design Space as a Print then Cut file.
There are two options on how to import your design. The first is to toggle one half of the carton off in Procreate, and upload each one individually. The second option is to upload the entire image at the same time, and once it is on the Design Space canvas, use a square shape to Slice them to separate.
Next was to map out where to put score lines for easy assembly. Under the Shapes tool I selected a Line. This inserts a Score line by default. I resized and positioned it to go along one of the areas to be folded. I duplicated this line to place on any parallel folding areas.
I repeated this process with vertical score lines. For the diagonal lines where the carton will fold inward, I carefully lined up what would be center, then duplicated the line and horizontally flipped the duplicate. Then I aligned the new line.
I duplicated these lines and together positioned the duplicates on the other half of the carton.
Once all score lines were positioned, I highlighted everything and under Actions and selected Attach.
With everything ready to go, I selected Make It. For the print I used some photo paper I found at Dollar Tree. It had the appropriate glossy finish while being very cost effective.
First I sent the project to my printer, then attached a print on to the mat. Following the prompts, I installed the scoring tool and loaded the mat to let my Cricut do its thing.
Once the project was cut, I carefully folded along all the score lines, being mindful not to damage, bend or crimp the remaining image.
Using double-sided tape I attached the two halves of the milk carton together. I then folded and taped down the bottom of the box.
I inserted a crumpled piece of tissue paper and inserted my gift inside the box. I then folded and taped the top of the carton closed.
AND THAT’S IT!
My Westview Dairy milk carton gift box was complete and ready to be gifted.
That’s all I got for ya. Change up the color, farm’s name or completely change up the product entirely. Maybe it’s a carton of liquid snake eggs?… Whatever you want — it’s your day.
…Okay, bye!


Thanks for your blog, nice to read. Do not stop.