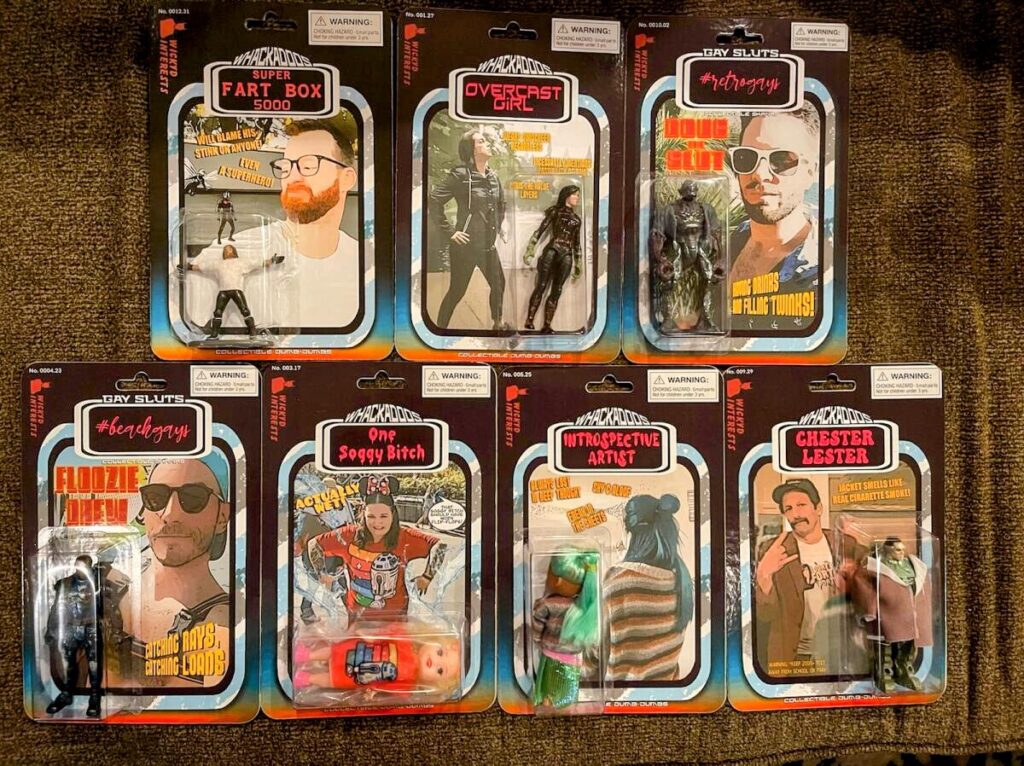
For my friend group last holiday season I wanted to find a way to meld both a truly personalized gift for everyone individually, yet I wanted the gifts to also match.
I remember as a child being so excited to receive a gift and find a brand new action figure under the wrapping. I couldn’t wait to play with it!
I thought if I could create a similar feeling of joy and innocence for them during our upcoming White Elephant party, I would succeed at being a good friend, with the added bonus of winning Christmas! Because of course it’s a competition… And yo’ boy’s gotta’ win, y’all!
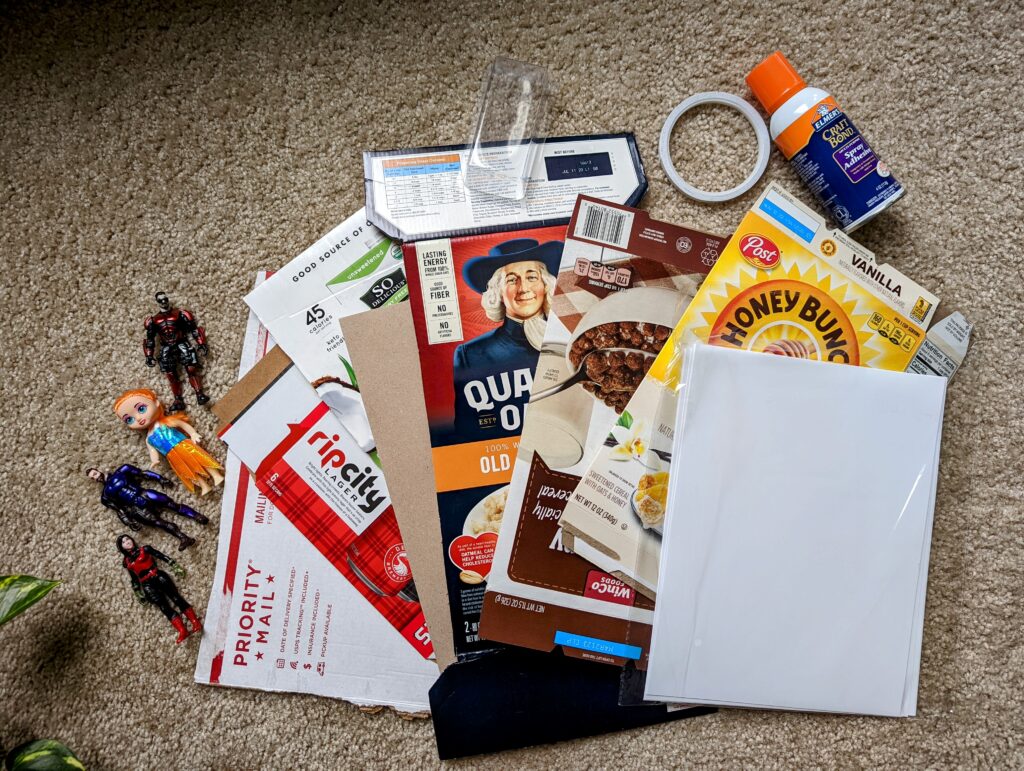
MATERIALS NEEDED
- Printable Vinyl – I use JANDJPACKAGING brand, it is an inexpensive vinyl that absorbs the ink well. Other cheaper brands I have tried in the past tend to leave a sticky feel.
- Some sort of thicker premium cardboard – cardboard mailers, Costco Product Boxes, any sturdy, flat cardboard without indents or creasing.
- A thinner cardboard or similar material such as a cereal box or poster board. Cricut Maker with the Deep Cut Blade.
- Small Action Figures – smaller than 4-inches. Think vintage Star Wars action figures that were 3.75”. I found a selection at the Dollar Tree of action figures this size. eBay sells lots of them at varying pricing. Other ideas include molding your own out of air drying clay, using non-human figurines, (i.e. mini dinosaurs/farm animals), if you or someone you know has a 3D printer… if you’re having trouble finding them then get creative.
- Bubble Blisters – these are the clear packaging windows on action figure packaging where the actual figurine is displayed. I purchased mine on Etsy for $12+/- for a pack of 10.
- Double Sided tape, acid glue or acid-free adhesive spray.
- Illustrator, Inkscape, PROCREATE or whatever software to design your packaging you are comfortable with.
DESIGNING THE PACKAGING
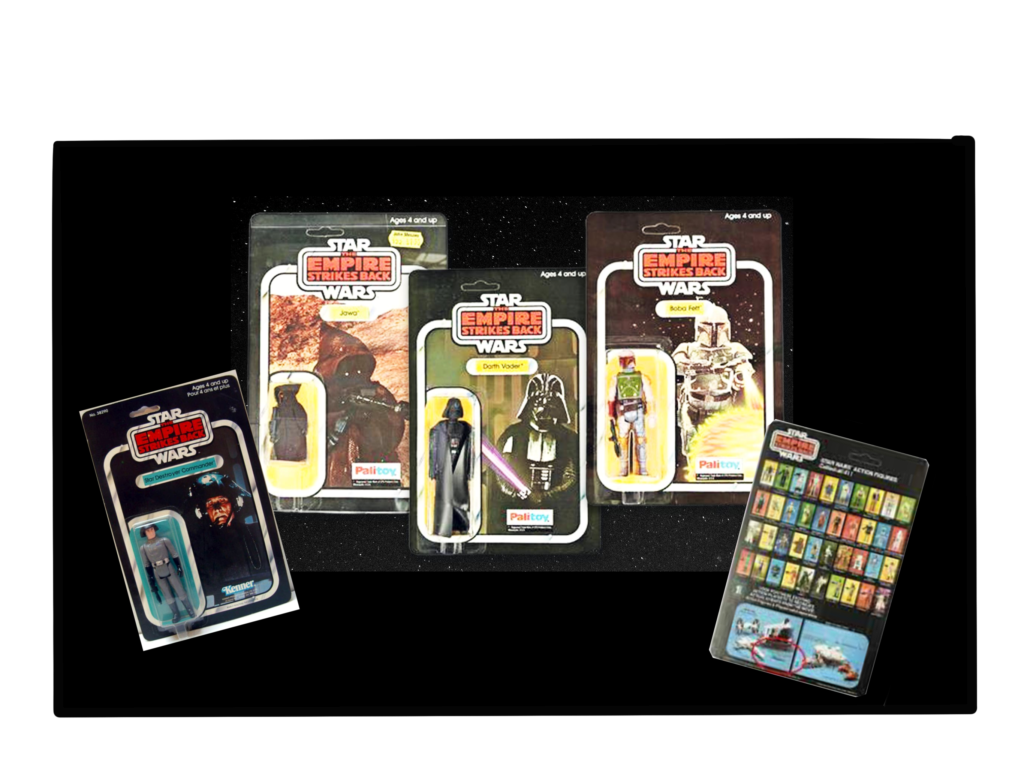
Early on I decided I wanted my action figures look to mimic that of the original Star Wars packaging. After doing some research I learned that the actual packaging dimensions are 6×9 inches. I also searched for images as reference.
So using whatever design software you have chosen, create your canvas to 6×9”. Then begin to create your packaging, making sure to have fun with it.
(If you are familiar with Illustrator, Inkscape or have experience with graphic design, feel free to do your own thing and jump to the next section. I however am not particularly graphic design savvy, and created the design on Procreate using good old fashioned trial and error)
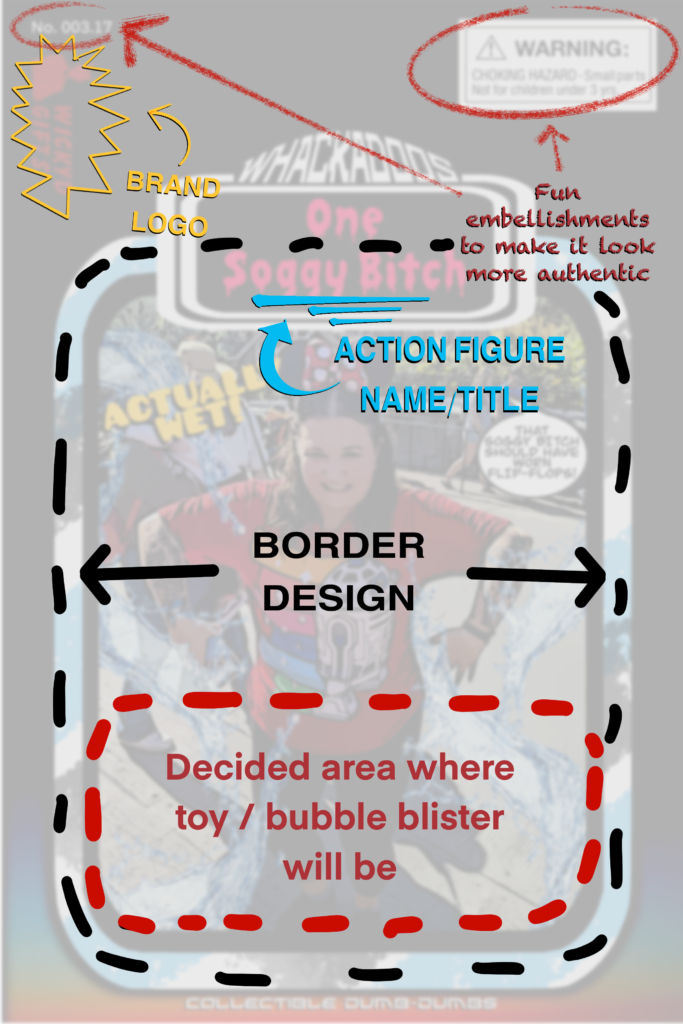
Key elements to focus on that helped me in designing:
- Creating a border where your image will reside
- The actual image of the person you are creating this for and any manipulation that you may want to add to it
- Making sure your main character’s image will not be obstructed from where the actual action figure and bubble blister will reside
- Creating the name of your character and choosing the appropriate font
- Adding embellishments on the top of the packaging such as a fake company or manufacturer’s name, an “Ages 5 and up” disclaimer or any other design element that is commonly found on traditional packaging. I stayed fairly loyal to the examples I found as reference for the front image. I used a free online photo editing software to add an effect to my friends’ images and give them a more comic book style look.
For the back image I took a lot more liberties in how the layout would work. I also used the majority of the space for a biography of my made up characters.
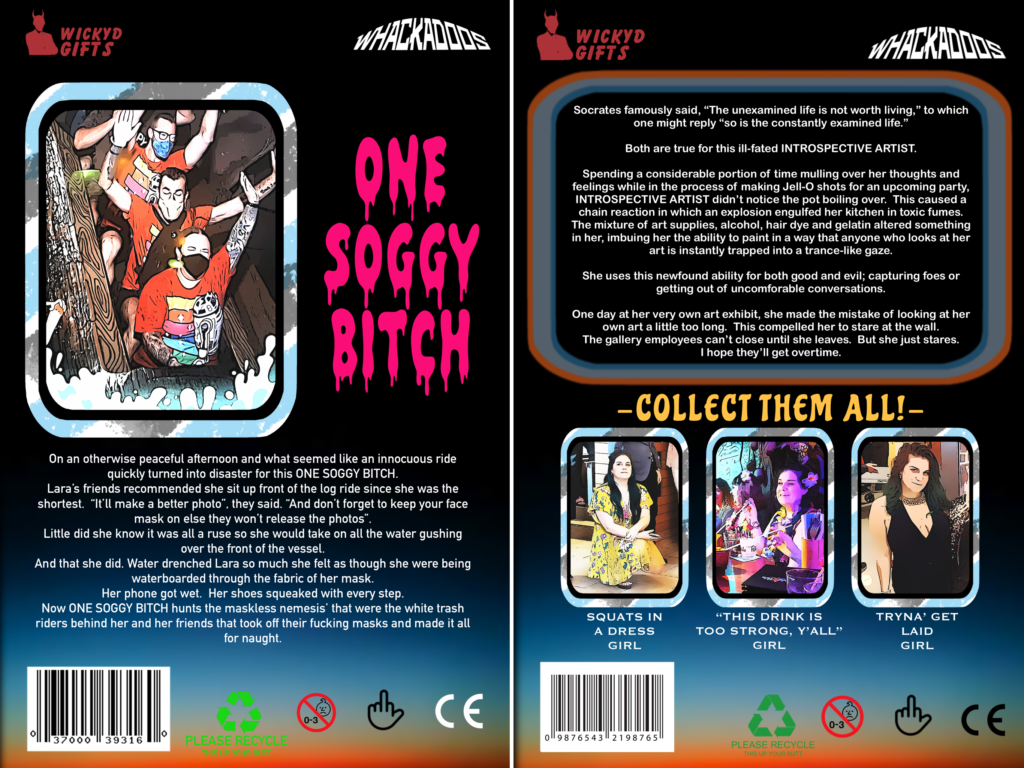
After I was happy with the overall look, it was time to save it and bring it into Cricut Design Space for printing and cutting it all out.
PACKAGING
With the designs completed, I needed to prepare the cutting elements in Cricut Design Space to create realistic looking package backing cards.
First I brought in the designs from Procreate. I saved them as Print Then Cut files, brought them into my canvas and made sure they were sized to 6×9”.
I went to the “shapes” tool and selected a square. This too was resized to 6×9”
I wanted the edges to be rounded just as real packaging is. To do this I chose a circle shape and sized it down. I brought it to one corner of the square and made sure it was aligned to the bottom and side without any overhang. I then selected both shapes and clicked “slice”.
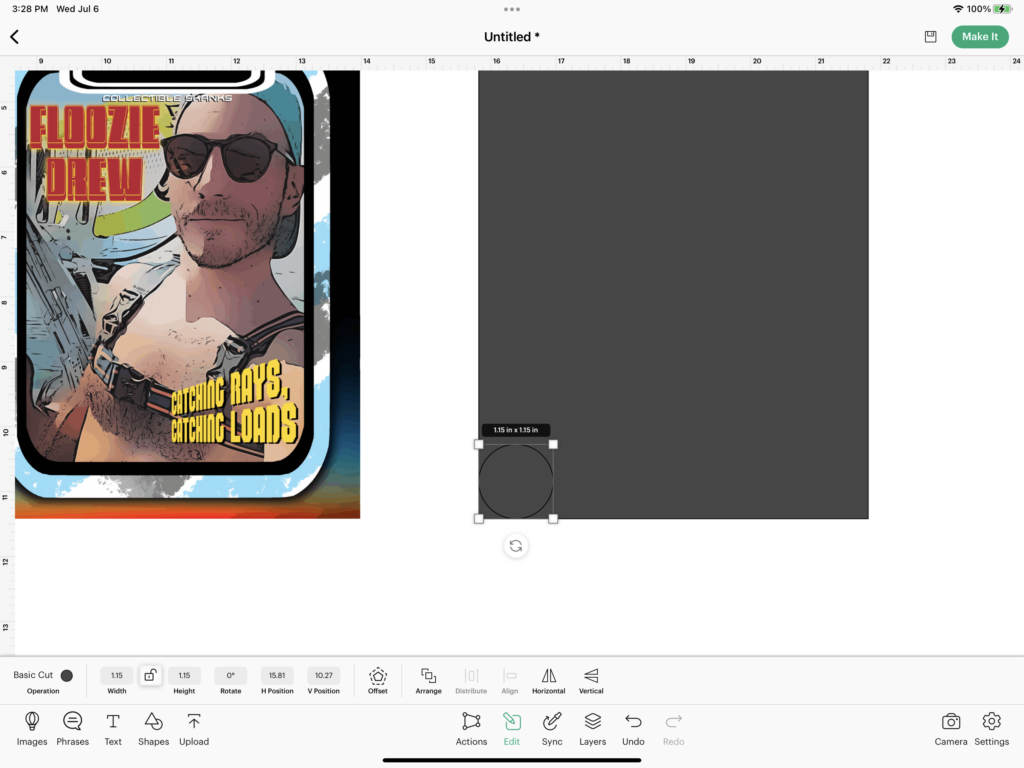
There were now two circles. I deleted one, and using the second I aligned it to center over the remainder of the original corner. (Lines will appear when it is centered to each side as guides). Once this was properly placed I highlighted the two shapes and sliced them as well. Now I had two corner pieces no longer attached to the original box.
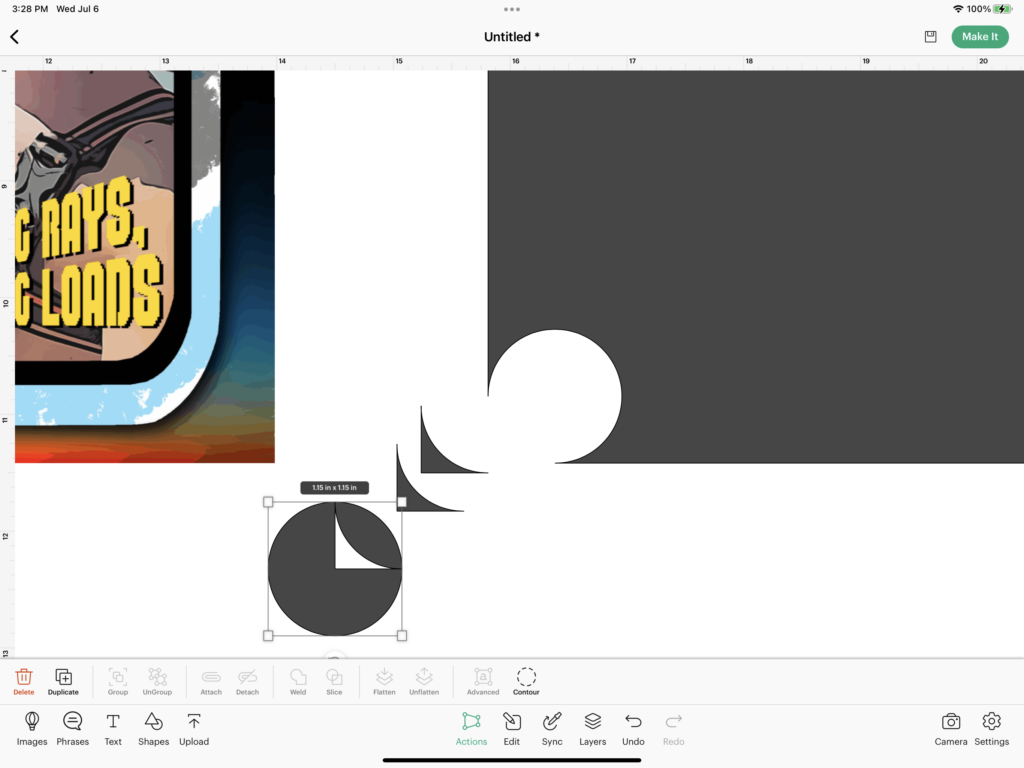
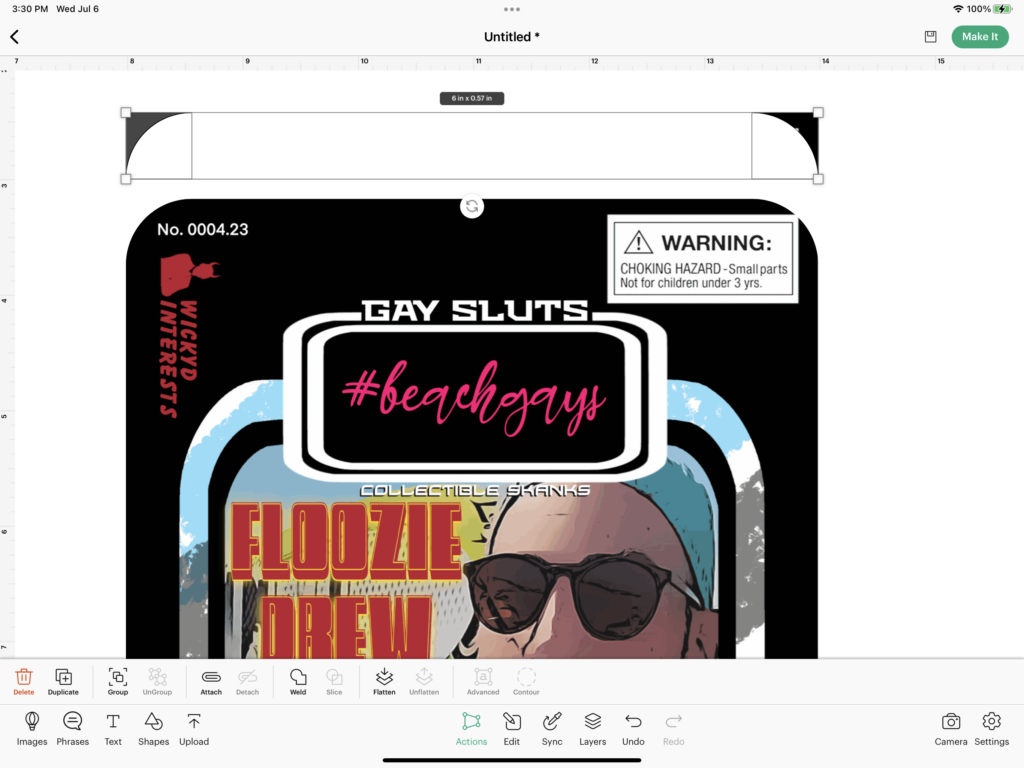
I placed the corner pieces onto either side of my design, taking care to place them in the corners evenly. One at a time highlighted both corners to again slice. This created the curved edge I was looking for. Next I duplicated my design, and taking one copy I rotated it 180-degrees so the curved edges were toward the bottom. I aligned both copies atop one another, highlighted both, and once again sliced the images. I then deleted the excess corner pieces as well as the extra copy of my design.
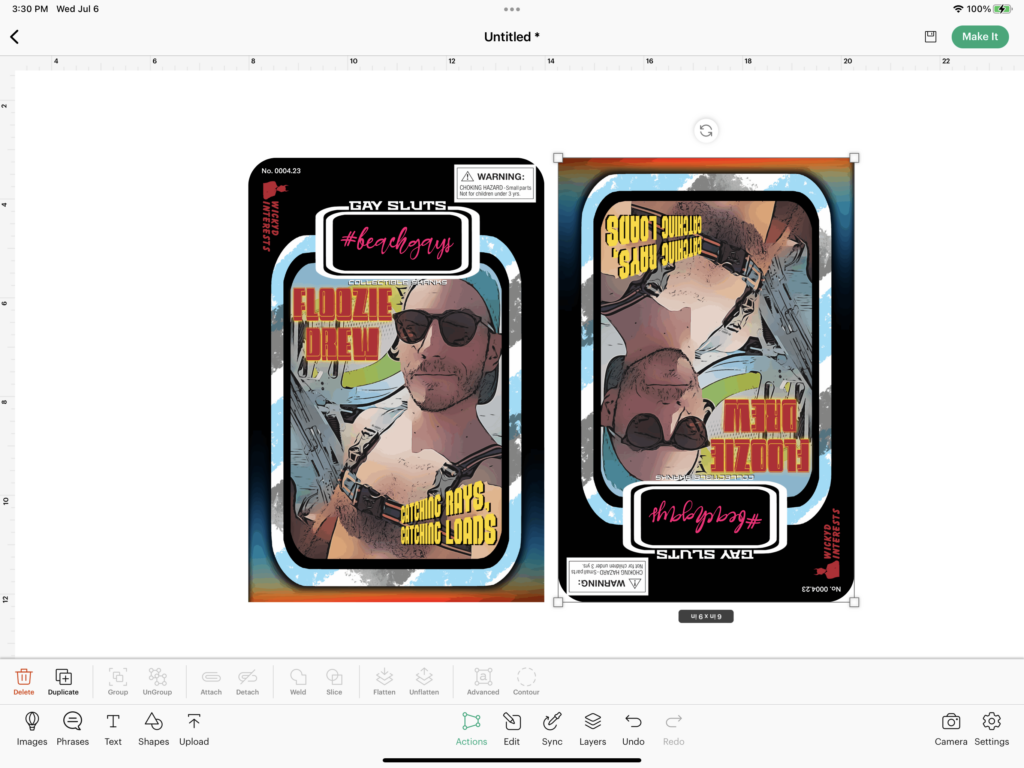
Next I wanted my packaging to have a display hook punch out. Going back to shapes I selected another square. This one I shrunk down quite a bit by unlocking its dimensions. I decided that my punch out would be 1.13” long and just .26” in height. I then selected a circle shape and resized it to the same .26” in height. I duplicated it, added it to either end making sure the center aligned to the edge of my now rectangle shape, selected everything and clicked “weld”.
A final circle that was sized to .37” was placed to the center of my new shape and aligned to hang over the shape at its center. Finally these were also welded together. (For the record I just eyeballed everything, so adjust your sizes to your liking)
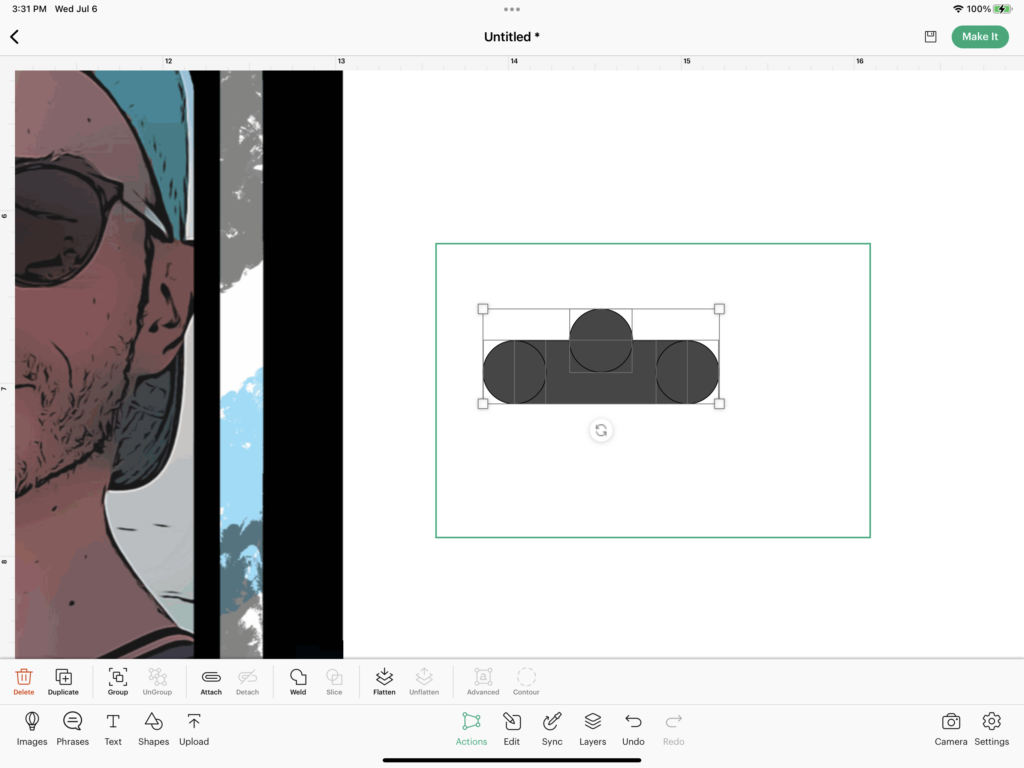
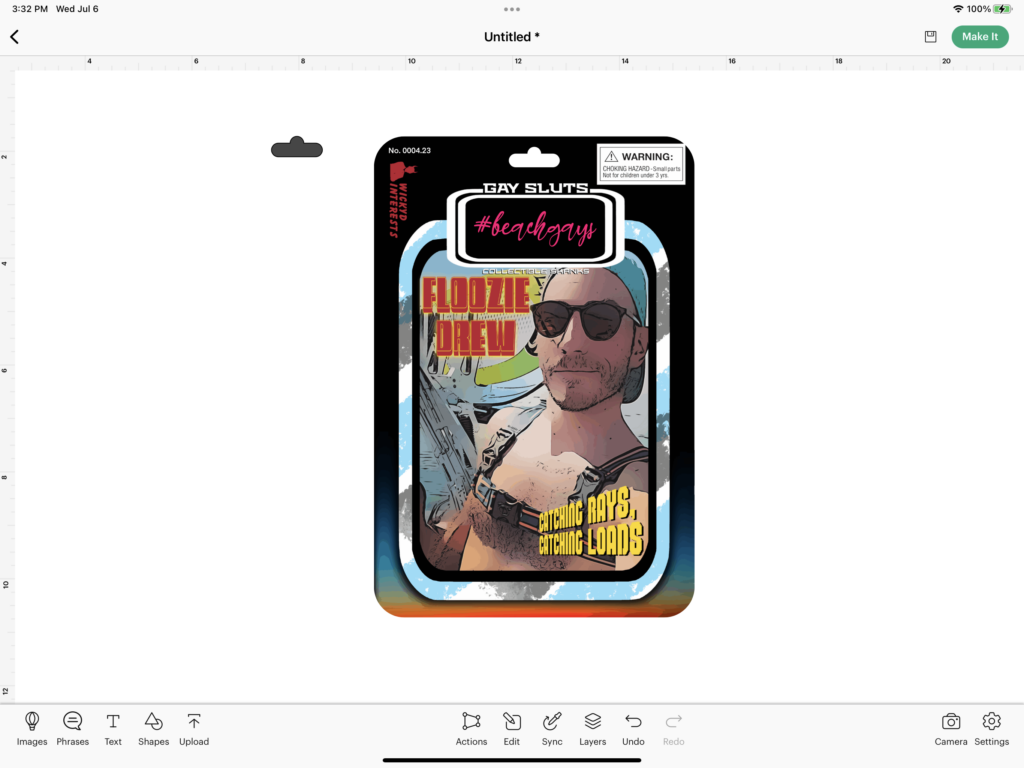
With the shape of my new punch out complete, I sliced it out of my Print then Cut packaging designs. For it to be functional the punch out would need to be off-centered for proper weight distribution to keep the packaging straight. Since this is a novelty gift that will not actually be hung on a hook, however, I opted to cut it out directly at the center mark.
MAKE IT:
Now that the design was complete and the image had been prepped to be cut, it was time to put it all together.
I loaded my printable vinyl into the printer, Selected Make It, and selected Print for both images.
While the images were printing I prepared the cardboard by cutting it down to the dimensions of the vinyl.
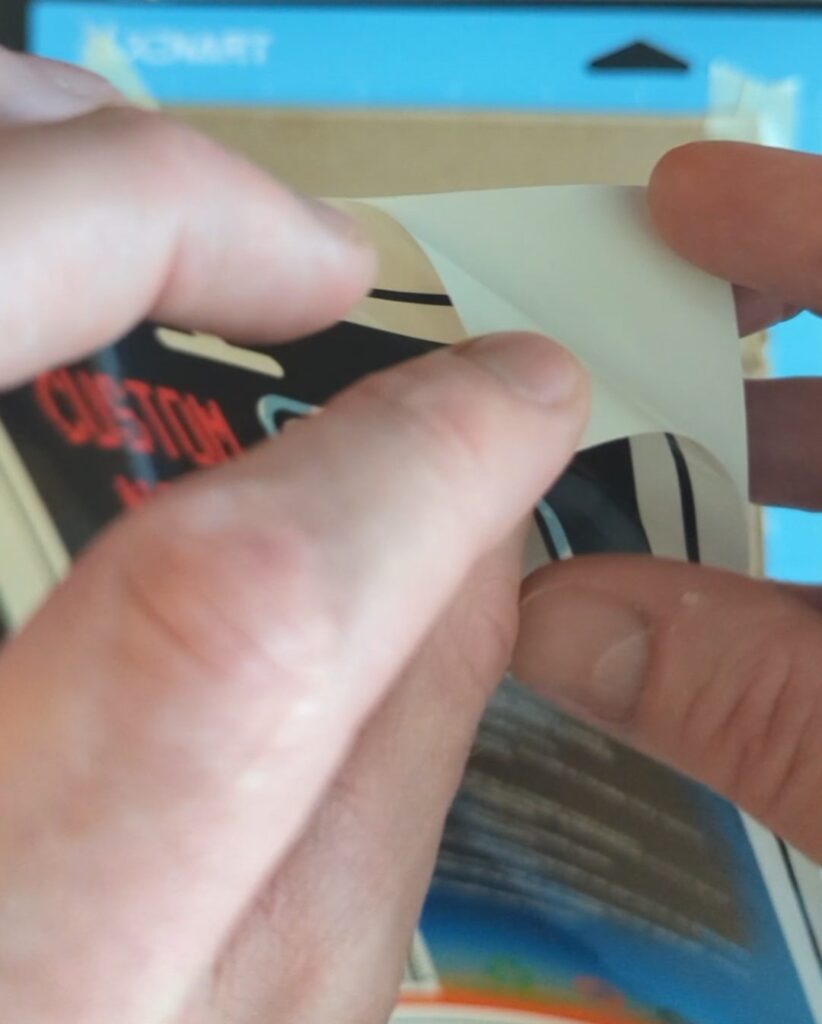
With the prints prepared, I applied the front image to the cardboard by peeling the backing of one corner and carefully lining it up to the corner of the cardboard. Then I slowly pulled back the backing at a diagonal angle while simultaneously pressing the vinyl down with my other hand attempting to not collect any air bubbles between the two materials.
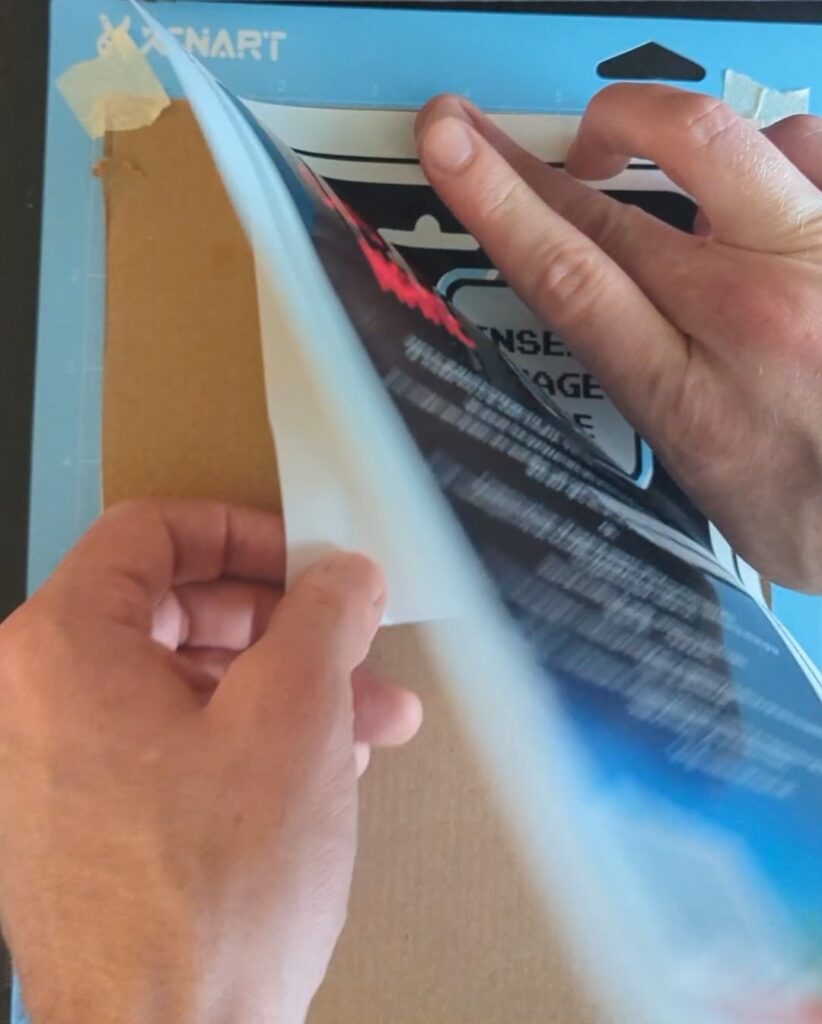
I attached the project to a standard grip mat and taped down the corners for added grip, being mindful of the registration marks on the image.
Because I used heavy cardboard, I opted to choose Chipboard as my material. This requires the Knife Blade, which creates deeper cuts and multiple passes to get through the cardboard’s thickness.
*The Knife Blade will not work using the Design Space mobile app. You will have to use the desktop version to use the Knife Blade. However, if you only have the app version you may opt for a thinner material for both sides [cereal box or poster board]. The packaging just won’t be as sturdy.
(I attempted using the Deep-Point blade, and although it did cut through my thick cardboard with multiple passes, it was a bit jagged and ripped some of the printable vinyl.)
I loaded the mat, selected the Go button and allowed my Cricut to scan the registration marks and cut out my image. After a few passes I paused the machine to check if it had cut through. I was concerned overcutting would ruin my mat. It ended up taking a total of 7 passes to cleanly cut all the way through with the thickness of my selected cardboard with added vinyl.
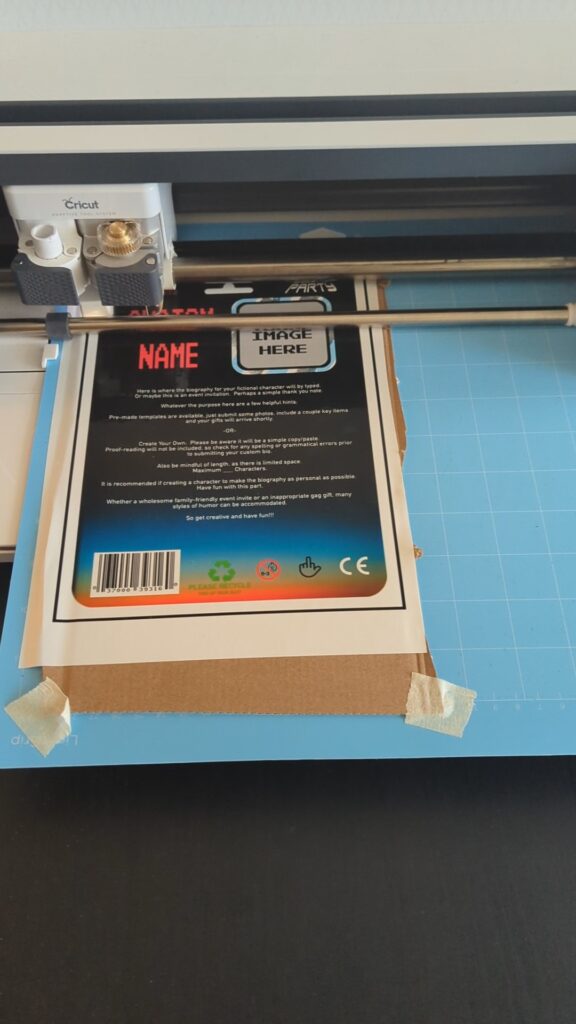
For the back image I used the same technique to apply the vinyl but this time attaching it to a thin cereal box cardboard. I swapped back to the fine tip blade and selected Cereal Box as my material, also selecting More for the pressure. I prepared the cardboard onto the mat in the same manner, and allowed my Cricut to work its magic.
Before unloading the mat I checked to see if it had fully cut through. Because it needed another pass I pressed the Go button once more to guarantee everything was completely cut.
With both sides completed, it was time to attach the two together. I had a strong double-sided tape at my disposal, but an acid-free adhesive or spray glue would also work. (If using a liquid adhesive just make sure not to oversaturate as it could warp your product). Whichever adhesive you use, carefully apply around the outer edges and the edges of the hook punch-out.
Carefully align the two sides together, and once you are happy with their placement, firmly apply pressure to adhere.
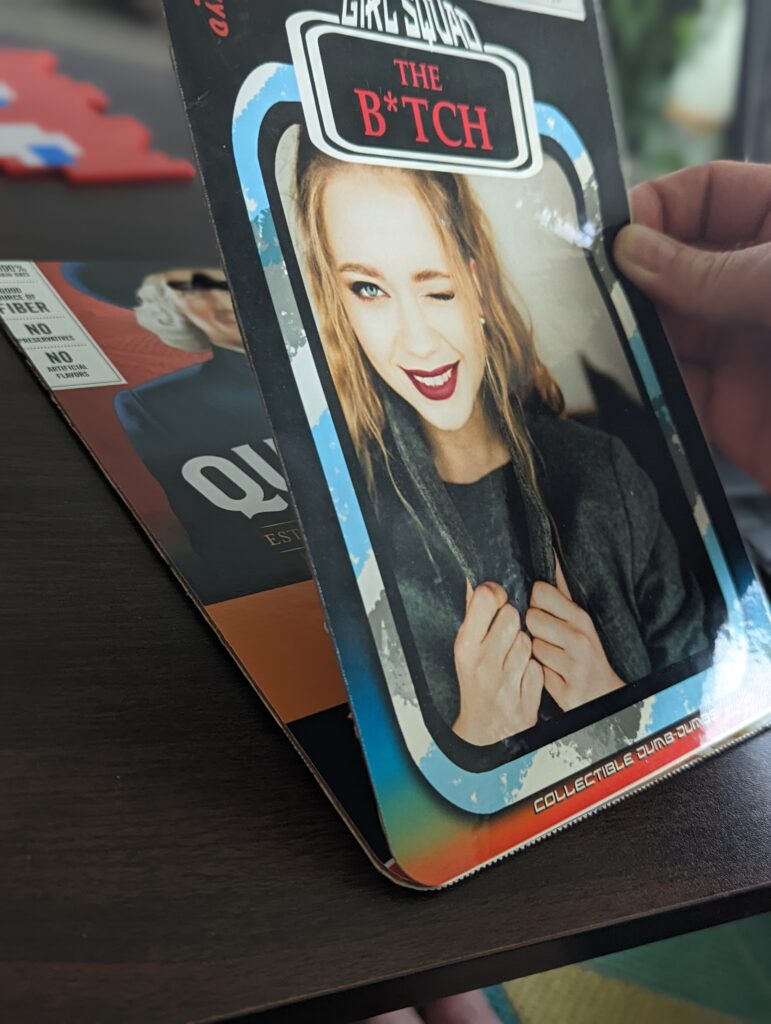
I then placed my action figure onto the area it will reside on my front image. I placed the bubble blister on top of it to check if I liked its placement. Once I was happy with the location, I attached double-sided tape around the bubble blister’s edges, took off the backing and carefully attached it (with action figure placed) onto the package.
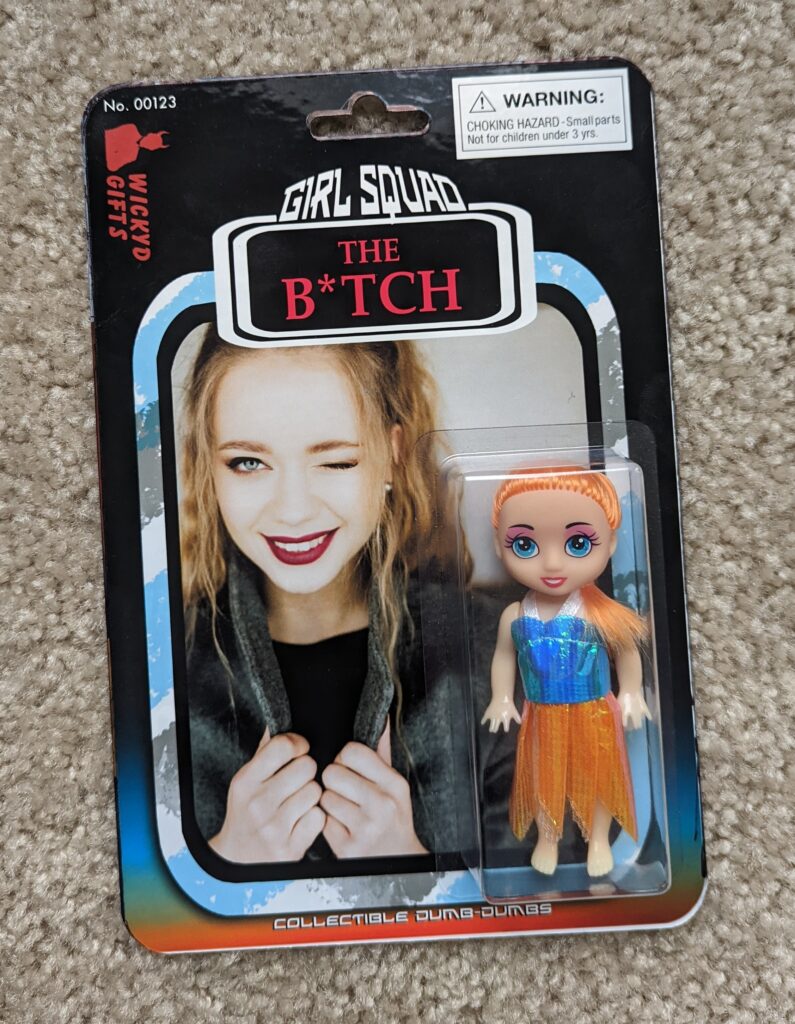
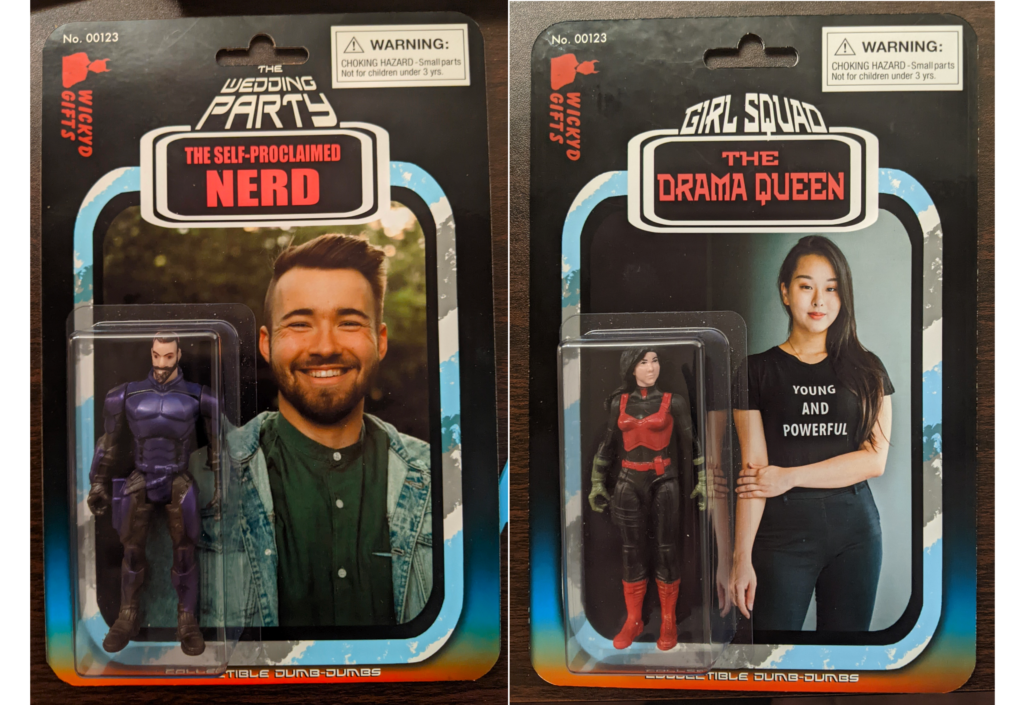
AND HOORAY!! MY ACTION FIGURE PACKAGING WAS COMPLETE!!
NOW YOUR TURN!
This project was so much fun to make. It was a bit more time consuming than most other projects I do because of the designing aspect of it, but honestly that was the most rewarding part. I really loved creating each design for each person. One bio write up was heartfelt, another snarky and mean, each one reminded me of the kind of relationship I have with each person individually.
And I’m excited to see what other applications this could be used for. Perhaps as a “Be in my Wedding Party” invitation or a coworker’s going away gift. Oh the possibilities…
What kind of action figure packaging will you make? Get creative, have fun and make some weird shit!
…Okay, bye.

